In this PySpark tutorial, we will see how to install PySpark in Windows Operating systems with the help of step by step guide. There are various steps involved in PySpark installation but don’t worry if you follow all the steps carefully then definitely you can install and run PySpark on your Windows machine.
Before going to deep dive into this article, let’s see a little about Spark and PySpark so you could’t have any confusion regarding PySpark and Spark.
Headings of Contents
What is Spark?

Spark is a unified cluster computing big data processing framework or engine. Spark is mostly used for Data Engineering, Data Science, and Machine Learning on single or multiple clusters. Officially Spark is written in Scala programming language.
Features of Apache Spark:
- Batch/Streamming Data:- We can perform batch processing or streaming processing. The difference between batch processing and streamming processing is that In batch processing data comes to perform processing periodically but in streamming processing data comes continuously to perform processing. We can use our preferred language to process that data.
- SQL Analytics:- Apache Spark also allows to perform the SQL queries to get the reporting for dashboarding.
- Machine Learning:- Spark provides a module called MLlib to perform machine learning operations.
Let’s move on to the PySpark.
What is PySpark?
PySpark is nothing but it is an interface written in Python programming just like another package to interact with Apache Spark. Using PySpark APIs our application can use all the functionalities of Apache Spark to process large-scale datasets and perform operations on top of loaded datasets.
Who Can Learn PySpark?
If you come from a Python programming background then you can go with PySpark because it is just an interface which completely written in Python programming Language to access all the functionality of Apache Spark.
Now, Follow the below steps to install PySpark in Windows 11.
How to install PySpark in Windows Operating System
Now, Follow the below steps to install PySpark in Windows 11.
1. Python Installation
To work with PySpark, Python must be installed in your system. So to install Python go the python.org and download and install the latest version of Python. You can ignore this if you have already installed Python on your machine.
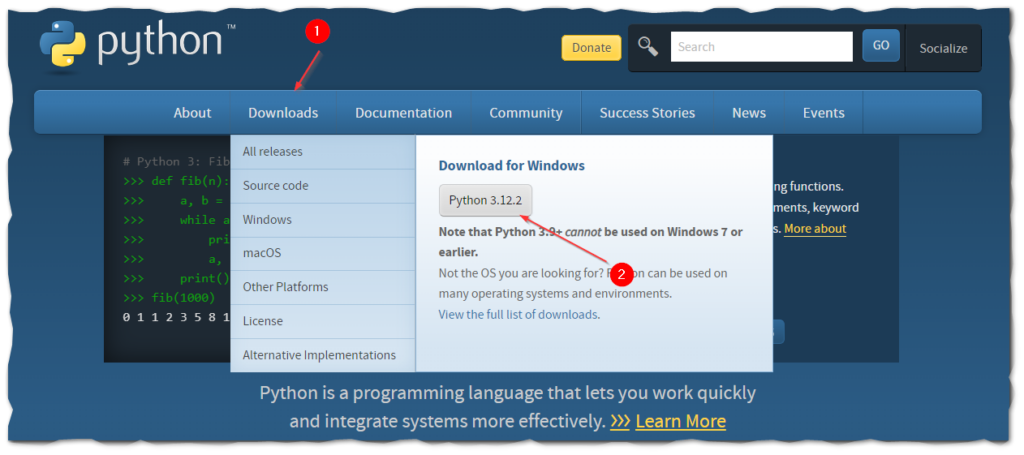
Note:- Your Python version version might be different.
After downloading, Install Python just like normal applications. After the installation of the Python open the command prompt and type python. If you see output like this that means Python has been successfully installed on your machine.

👉Install Python in Windows, Ububtu and Linux:- Click Here
2. Java Installation
To run the PySpark application, you will need Java on your Windows machine.
- Go to Java official Website to download and install Java.
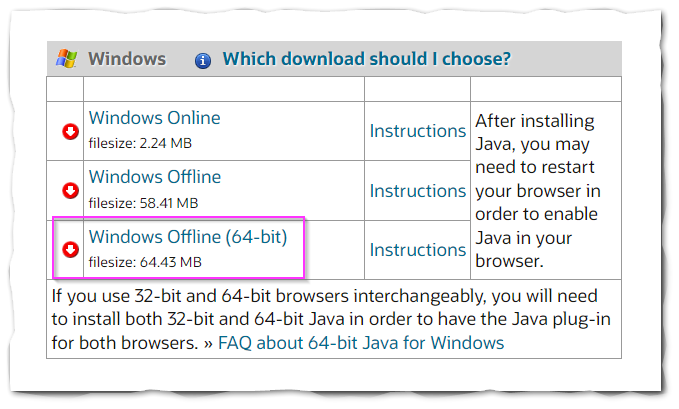
- Click on “Windows Offline (64-bit)” to download Java.
- Open the downloaded file and click on the Install button.
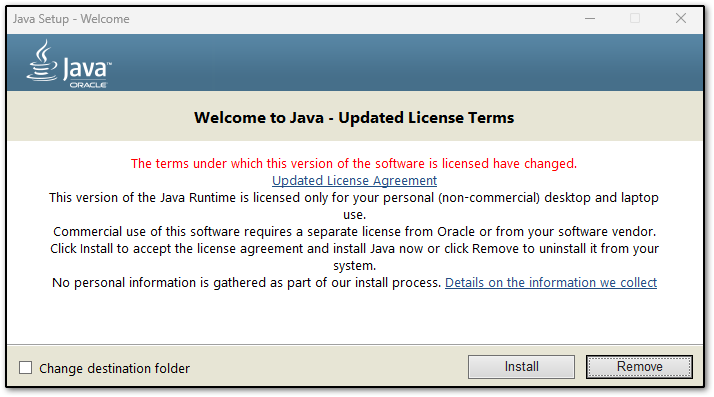
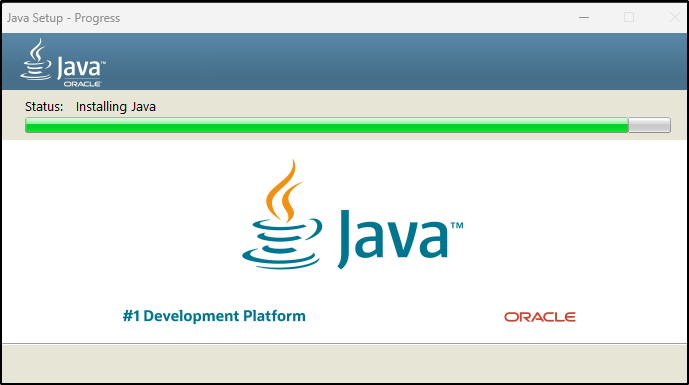
- Now the installation of Java will be started.
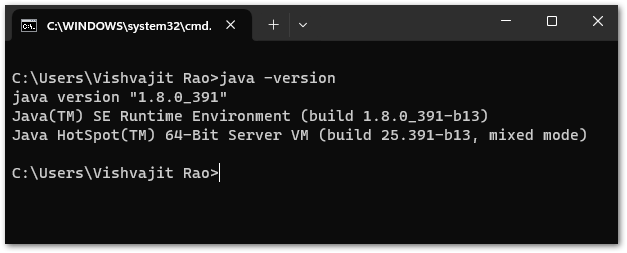
- After completing installation, Go to “Command Prompt” and type “java -version” to know the version of Java and to know whether it is installed or not.
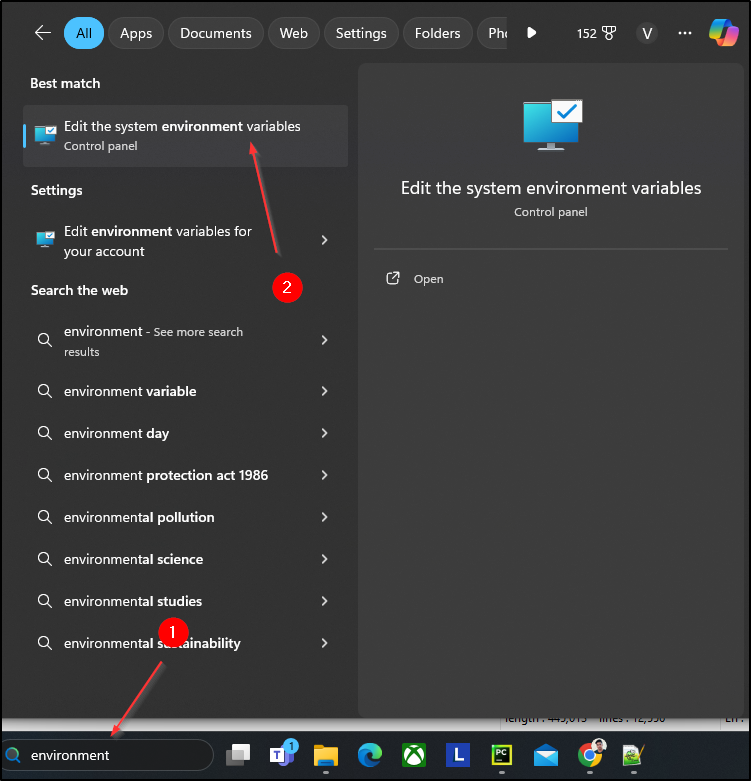
- Now, It’s time to set the Java installation path to Windows Environment variables. To set environment variables, type “environment” in the window search bar click on “edit the system environment variables” and set the below variables.
JAVA_HOME=C:\Program Files\Java\jre-1.8
PATH=C:\Program Files\Java\jre-1.8\bin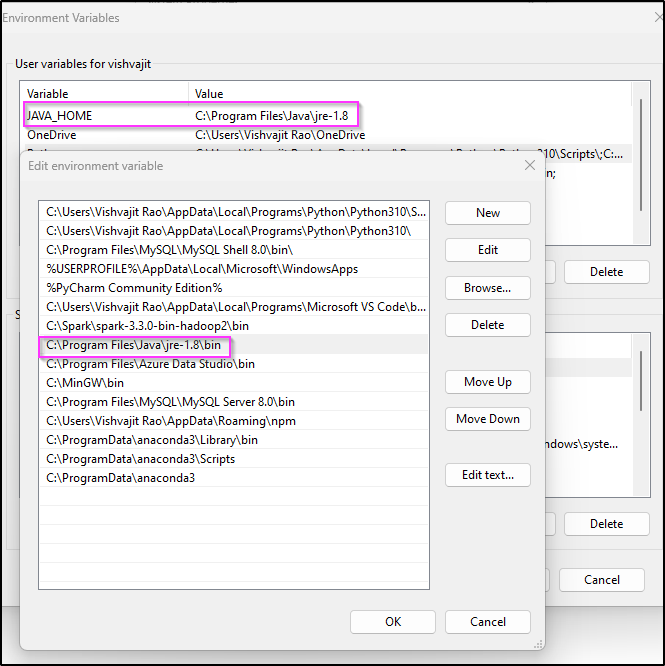
Note:- In your case path of environment variables might be different.
Now, you have successfully installed Java on your machine.
3. PySpark Installation
There is no separate PySpark Library to install, To work with PySpark we need to install Spark in your machine because PySpark is just an interface to interact with Spark or Apache Spark.
Follow the below steps to install PySpark in Windows operating system.
- Go to the Spark website to download and install Apache Spark.
- Choose the Spark release and click on the third link to download the Spark.

- Click on the first link to download the Spark.

- After completing the downloading of the spark, go to C drive create a folder called ‘spark‘, and extract the downloaded spark files inside the spark folder. As you can below in my case.
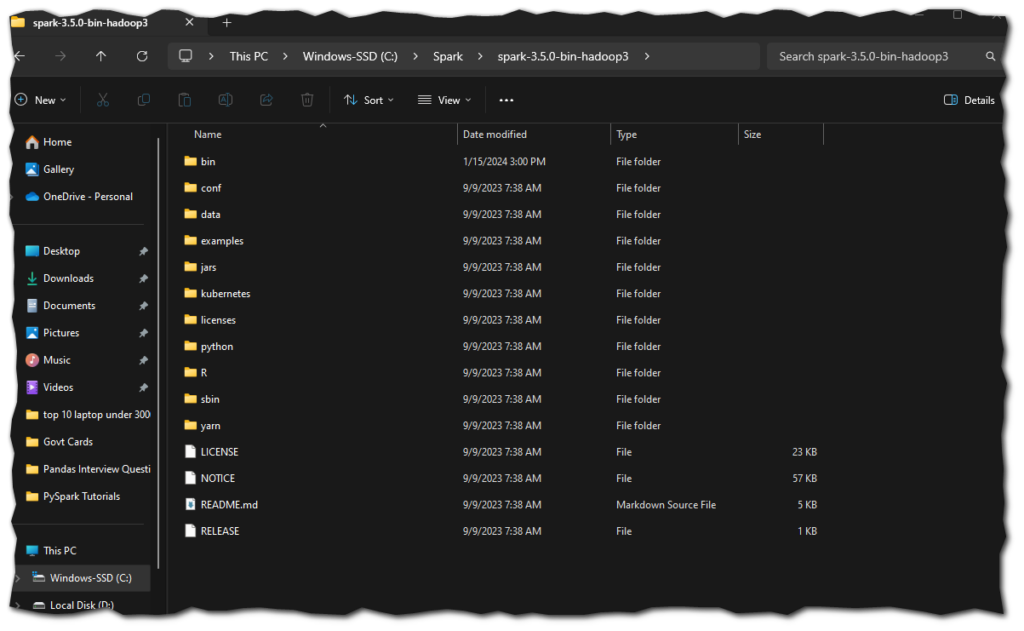
- Now, it’s time to set up some environment variables for Spark. Let’s set up the following environment variables for spark.
SPARK_HOME  = C:\Spark\spark-3.5.0-bin-hadoop3
HADOOP_HOME = C:\Spark\spark-3.5.0-bin-hadoop3
PATH=%PATH%;C:\Spark\spark-3.5.0-bin-hadoop3\bin
Now, You have successfully installed the Spark.
4. Install Winutils in Windows
winutils is a binary file that is required for Hadoop versions.
Go to Winutils choose the Hadoop version that you downloaded earlier and download the winutils.exe file.
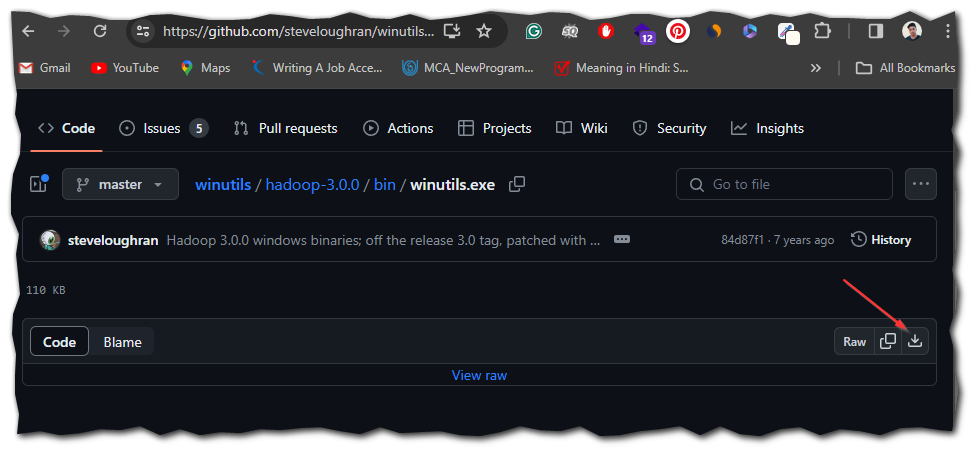
You can explore all the winutils files according to Hadoop versions from this https://github.com/steveloughran/winutils
Now, We have completed all the steps successfully, it’s time to check whether PySpark is installed or not.
PySpark Shell
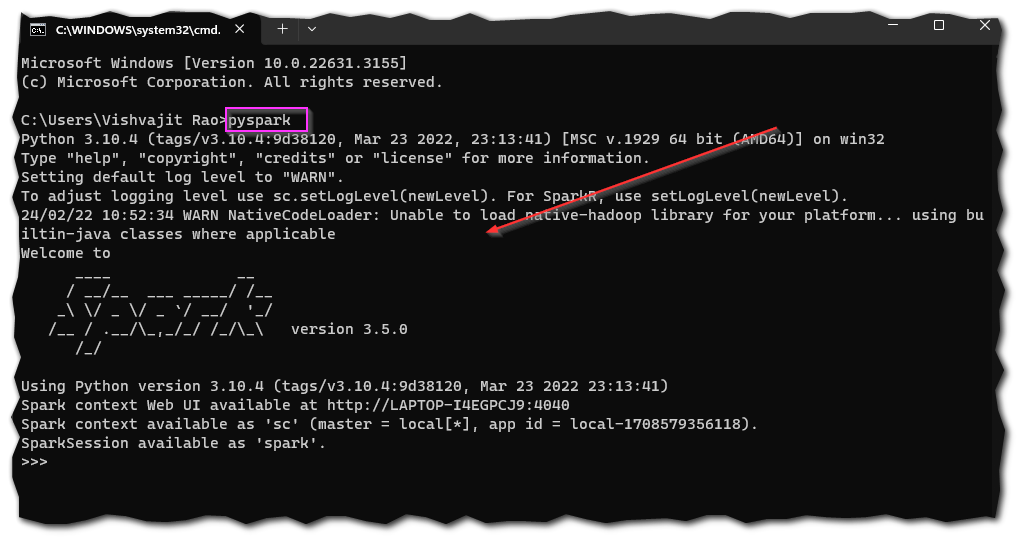
To check, go to the Windows command prompt and type pyspark. If you see output like this it means PySpark has been downloaded and installed successfully in your Windows operating system.
Spark Web UI
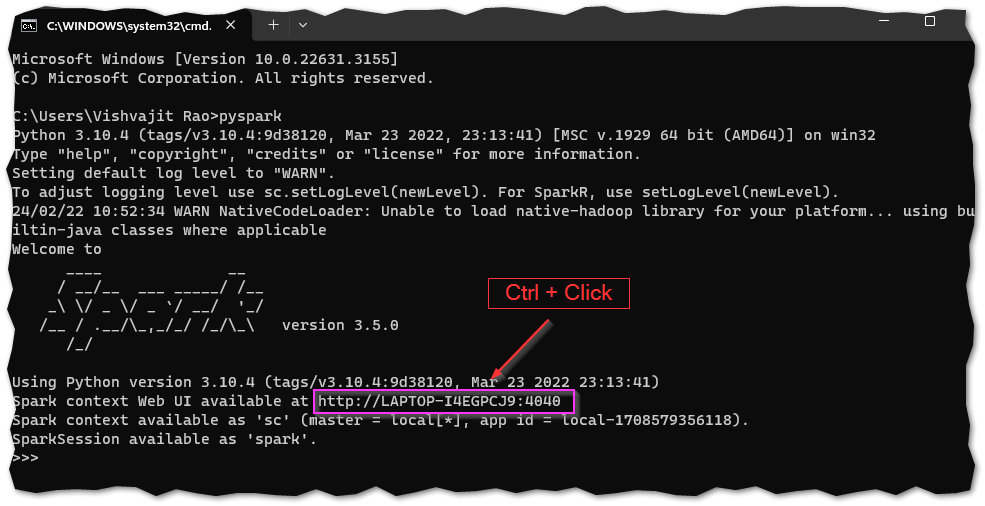
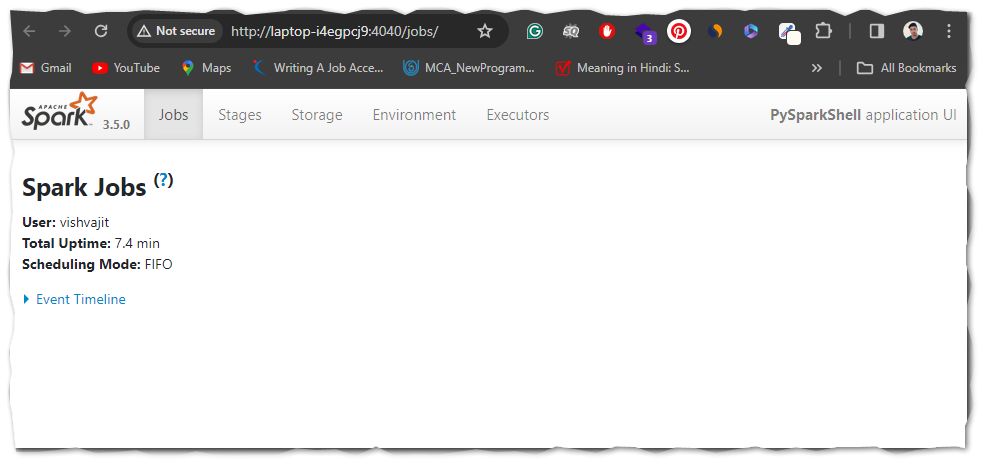
Apache Spark provides a Web UI ( Jobs, Stages, Tasks, Storage, Environment, Executors, and SQL) to check the status of your Spark application. To access the Web UI follow the link mentioned in the below output.
After visiting the Web UI lik your web UI will look like this.
Conclusion
Congratulations!, You have made it. Now you are completely able to run PySpark applications on your machine.
Throughout this article, we have seen the installation of Python, Java, Spark, and Winutils which are necessary to work with PySpark and also we see a small PySpark program for wordcount.
If you found this article helpful, please visit our PySpark tutorial page and explore more interesting PySpark articles.
Thanks for visiting….


