Hi programmers, I hope you are doing well, In this Django ORM tutorial We are going to learn all about Django ORM ( Object Relational Mapper ). This Django ORM tutorial will give you a complete guide to working with ORM queries in Django. If you are a beginner in Django or planning to learn Django then you can’t ignore Django ORM.
If you don’t know how to use ORM in Django don’t worry after following this article, you will complete familiar with What is Django ORM and how to use ORM in Django?
Headings of Contents
What is Django ORM?
Django ORM is also called Django Object Relational Mapper it is a fancy word in Django and also one of the most important concepts in Django because it gives us full power to work with database data with the help of Object oriented way.
There are two ways to interact with data stored in the database first is using Django’s built-in admin panel and the second is using the Django ORM technique.
ORM in Django is one of the most used features by most Django developers because it gives an elegant and powerful way to work with data stored in the database like creating the object, deleting the object, retrieving the object, and updating the object.
To work with Django Object Relational Mapper you have to use the shell command to enter in Django shell.
Important Notes:- To work with Django ORM you should have knowledge of the Django model. Click here to learn all about the Django model.
Throughout this article, will follow the following models defined inside the Django app.
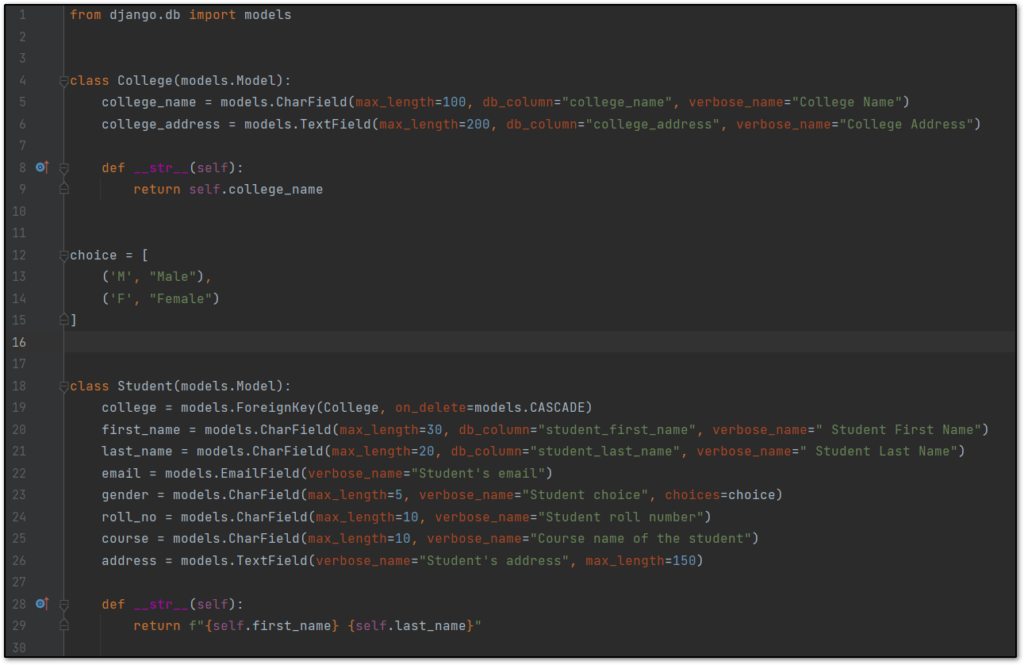
After defining the above model you have to use the following two commands.
python manage.py makemigrations
python manage.py migrate
How to use ORM in Django?
Now it’s to time to work with eexciting Django features which as Django ORM Queries.
Start Django Shell
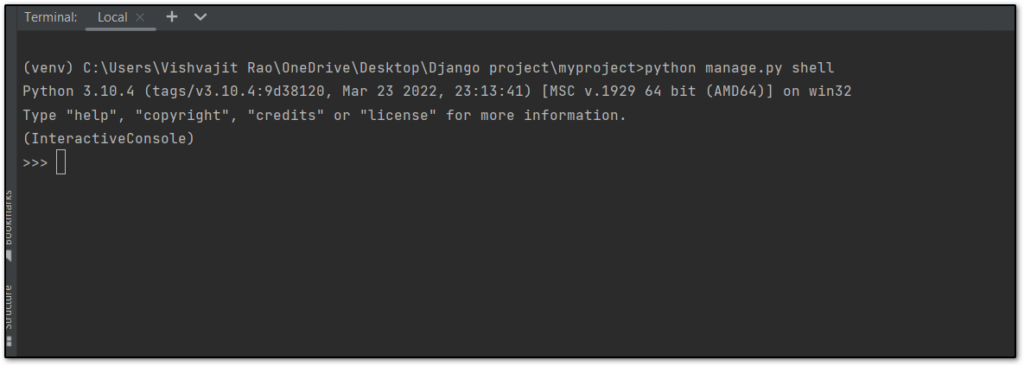
You have to remember always, to work with Django Object Relational Mapper you have to use the shell command. You can use the following command to enter the Django shell.
Note:- Make sure the shell command is being executed in the same location where the manage.py file resides.
python manage.py shellOnce the above command is successfully executed, you will get the below interface.
Creating the objects
Here I am just going to create the college object and student of a particular object because as we know that a student always belongs to a college.
Creating the College model object.
>>> from myapp.models import College, Student
>>> # creating the college
>>> col1 = College(college_name="ABC College", college_address="Delhi, India")
>>> # saving the college col1
>>> col1.save()
Now, you can see our first College object has been created. To print the college object just call the name of the object.
>>> col1
<College: ABC College>
Access the properties of the College object. Sometimes you want to access the properties of the Model object for example college_name and college_address are the properties of the College object col1.
To access the property of the object, you can use dot (.) along with the property name.
>>> col1.college_name
'ABC College'
>>> col1.college_address
'Delhi, India'
So far we have done with the College model now we are going to create the object of the Model Student who studying in college col1.
>>> st1 = Student(college=col1, first_name="Vishvajit", last_name="Rao", email="[email protected]", gender="M", roll_no="ST1001", course="MCA", address="UP, India")
>>> st1.save()
Now, we have successfully created the Student object st1 along with their details. You can easily see the name of the college of student st1 by using the following Django ORM queries.
>>> st1.college.college_name
'ABC College'
Retrieving the Objects
Let’s add more students so that can get more clarity on how to retrieve or view the existing records.
>>> st2 = Student(college=col1, first_name="John", last_name="doe", email="[email protected]", gender="M", roll_no="ST1002", course="MCA", address="USA")
>>> st2.save()
>>> st3 = Student(college=col1, first_name="Harshita", last_name="Kumari", email="[email protected]", gender="F", roll_no="ST1003", course="PHD", address="UP, India")
>>> st3.save()
To retrieve all the students, you can use the all() method which is the Django manager method that is responsible for fetching all the records from the specific table.
>>> Student.objects.all()
<QuerySet [<Student: Vishvajit Rao>, <Student: John doe>, <Student: Harshita Kumari>]>
Let’s see all the students whose gender is M ( Male ).To do this we will use the filter() manager method.
>>> Student.objects.filter(gender="M")
<QuerySet [<Student: Vishvajit Rao>, <Student: John doe>]>
Update the existing record
Now, let’s change the college name from ABC College to XYZ College.
>>> # before change the college name
>>> col1.college_name
'ABC College'
>>> # changing the college name
>>> col1.college_name = "XYZ College"
>>> col1.save()
Now, let’s see the name of the college of student st1 by using the following query.
>>> st1.college.college_name
'XYZ College'
Now, you can see the college name of the student st1 has been changed from ABC College to XYZ College.
Deleting the object
To delete the object you can use the delete() method which is the Django model object method. Here I am going to delete the st2.
>>> st2.delete()
(1, {'myapp.Student': 1})
Suppose you want to delete all the students whose gender is Male.
>>> Student.objects.filter(gender="M").delete()
(2, {'myapp.Student': 2})
Conclusion
So In this article, we have seen all about Django ORM and its usage. Django ORM is one of the most important features in Django for knowledge points and views as well as interviews because it gives complete power to work with the data stored in the database. In the later Django tutorial, you will see the most advanced concepts of Django.
I hope after following this Django ORM tutorial, you will not have any confusion regarding ORM in Django at least. If you like this article, please share and keep visiting for further Django interesting tutorials.
Related Articles:
Thanks for your valuable time …

